Customize map options from the Wemap Pro platform
A Wemap map has a pack of native options (by default), basic settings that you can choose to keep or customize according to your usage context.
You can modify the map options from Wemap Pro in the menu below the map, they are divided into 4 main sections:
-
Basic Layout
-
Point Display
-
Launch
-
Controls
Tip 💡 In each section, if you have any doubts about a feature, the ❓ button provides you with more information.
These options can also be modified from the JS SDK.
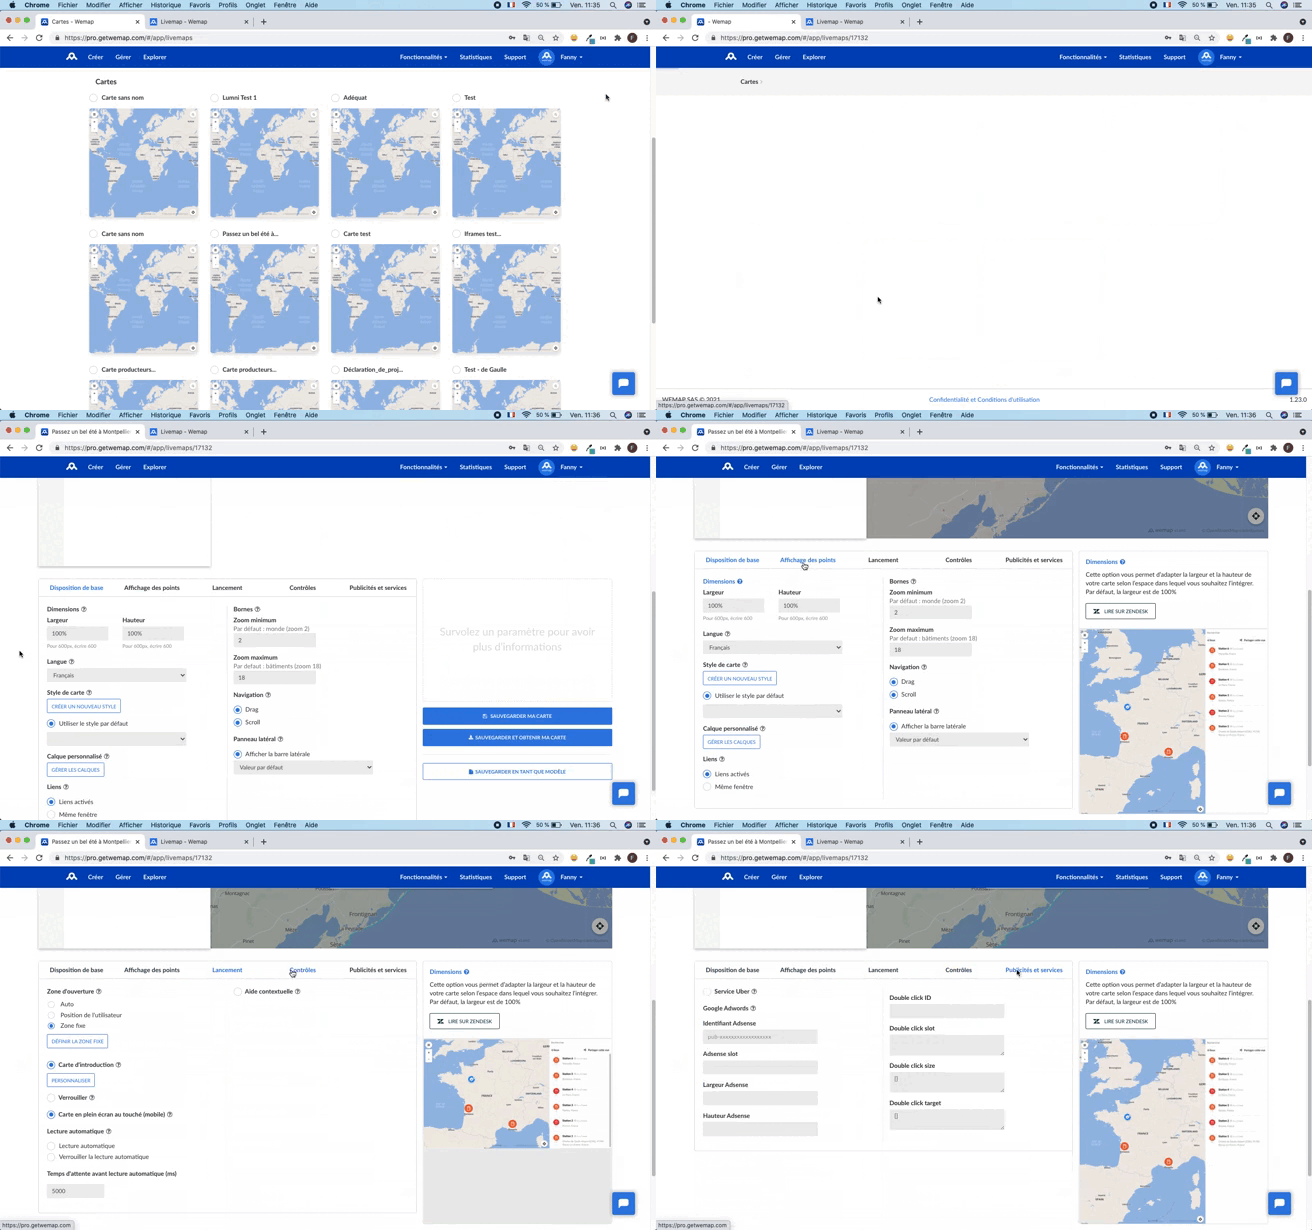
1 - Basic Layout:
 |
- Language: This option allows you to create multilingual maps and choose the language of your choice that will be offered to your map users. The basemap itself will be translated into English.
- Map Style: The stylesheet allows you to change the colors of the basemap (water color, land...) to customize it according to your graphic charter, the page on which it will be integrated, or even a particular event.
- Custom Layer: Layers allow you to manage lines and/or polygons on your map. You can draw/import routes or highlight a territory using a polygon that delimits the contours of a geographic area.
💡 Tip: You can use/link the same resource (layer and stylesheet) to one or more maps.
|
Learn all about managing your layers 👉 👉 👉 This way!
2 - Point Display:
 |
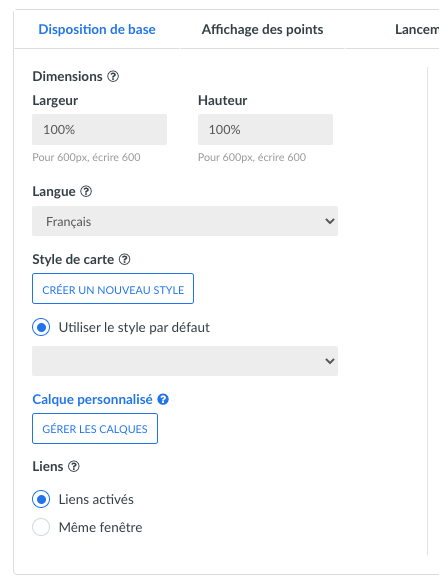
- Clusters: A cluster is a grouping of very close points into a single marker which allows better map readability. They work like a magnet and attract points around them.
- Cluster Radius: You can choose the strength of this attractiveness with the cluster radius option, the higher the radius, the more points the cluster attracts around it. It is therefore interesting to increase this radius when you have a high number of points. On the other hand, it is preferable to lower it when there are few points in order to have a better distribution of points on the map. By default, its strength is 80.
- Marker Size: You can also increase or decrease the size of points with this option to make a map containing a lot of data more readable or adapt your map according to the destination: Web, mobile app, kiosk...
- Visible Fields: they allow you to choose the information you want to appear on your POI. You can choose to display or hide the address and opening hours of the place, the author (account name) and publication dates (point creation date)
- Expand Description: If the description of your point is long, it will be truncated by default and the user will have to click to display it in full. To remedy this, you can choose to activate this feature.
- Priority to Events: this option must be activated if your list(s) have dates/times for the points to appear on the map.
|
Learn more about visible fields 👉 👉 👉 This way!
3 - Launch:
 |
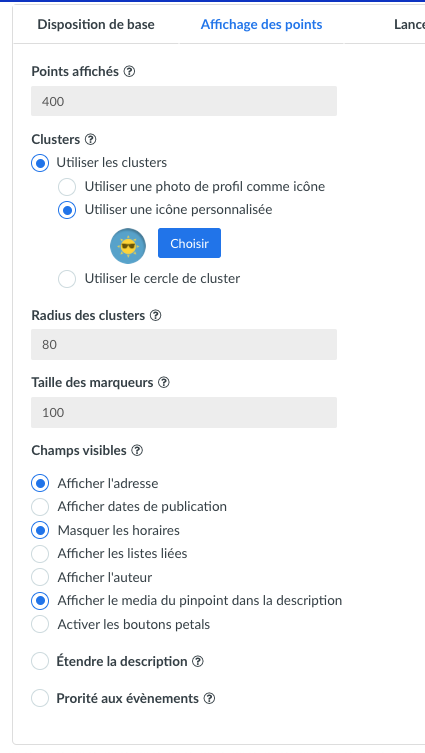
- Opening Area: This setting defines which view the map opens on.
- Auto: the map opens on a view of all points automatically
- User Position: the map opens on the user's location by geolocation (recommended for mobile use)
- Fixed Area: you decide which geographic area you want the map to open on (to be used to highlight a territory or simplify navigation). ==> Define the area using zoom and center the map on the determined area.
- Introduction Card: This is a welcome popup that opens when the map launches. It allows you to provide information to your users (map title, description, etc...) and offer a first level of search module.
- Full Screen Map on Touch: When your map is inserted in the middle of a web page, this option allows its display in full screen at the first touch on mobile.
- Autoplay: this feature is recommended for displaying your map on a kiosk or screen without user intervention, the points are then displayed randomly and without interruption.
|
Customize your introduction card 👉 👉 👉 This way!
4 - Controls:
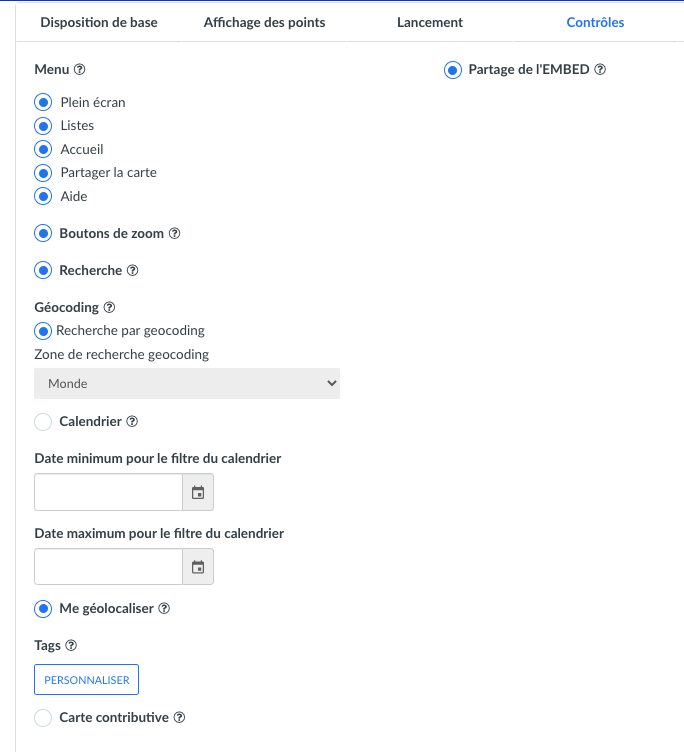 |
- Burger Menu: It is located at the top left of your map and can be customized according to the features you want to highlight.
- Geocoding Search: Wemap interactive maps allow you to integrate an address search functionality, you can define a geography that allows you to display priority address results in a defined area.
To learn more, check out our blog article about our search engine technology
- Calendar: Using the calendar allows searching on a selection of date ranges. Note that you can lock the search to a predefined period.
- Tags: To highlight important information and facilitate search by criteria, we recommend using tags. They are easily
|

