
Create a pop-up on click on a layer resource
Adding a pop-up on click to an object allows you to customize your map and make it more dynamic and interactive for users.
🛠️ GeoJSON Format
Displaying a pop-up on click requires importing a file in GeoJSON format, with the following structure:
json
{
  "type": "Feature",
  "properties": {
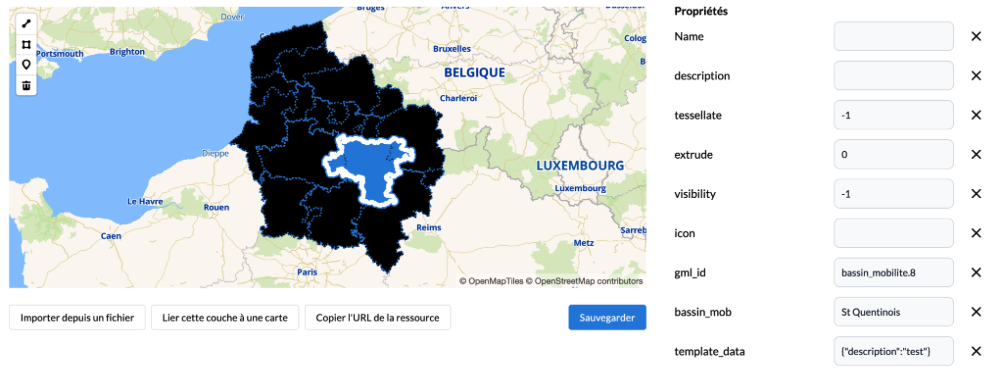
    "Name": "nom de mon point",
    "description": "je décris mon objet",
    "id": 1.0,
    "template_data": { "description": "test"
    }
  }
}
💡 Tip:
The template_data key will contain the content displayed in the pop-up:
- "template_data" corresponds to the key / property name in the file
- "description" corresponds to the key of the content to display
- "test" corresponds to the content to display
Simply add the template_data property to a standard GeoJSON and replace "test" with the content you want to display for each object.
You can also add a different key than "description", for example "name" etc (depending on the content you associate with it).
🗺️ Integration in Wemap Pro
☝️ Adding the GeoJSON File
- Go to Wemap Pro.
- Create a new resource: "Create" > "Resources".
- Enter the resource name and select "Data Layer".
- Click "Create Resource".
- Add your GeoJSON file by clicking "Import from File".

🧪 Customization & Integration
Customize your resource to your liking and remember to verify that it doesn't contain any errors (names, description, JSON structure...).
🗺️ Add the Resource to a Map
Two options are available:
- Create a new map → "Create" > "Map"
- Use an existing map → "Manage" > "My Maps"
From the map interface:
- Select "Styling", in the left sidebar.
- Click on "Manage Layers".
- Choose "Add from Editor".
- Select the GeoJSON resource you created, then click "Add".

🎯 Trigger Click Action and Customize Pop-up Description
In the layer options:
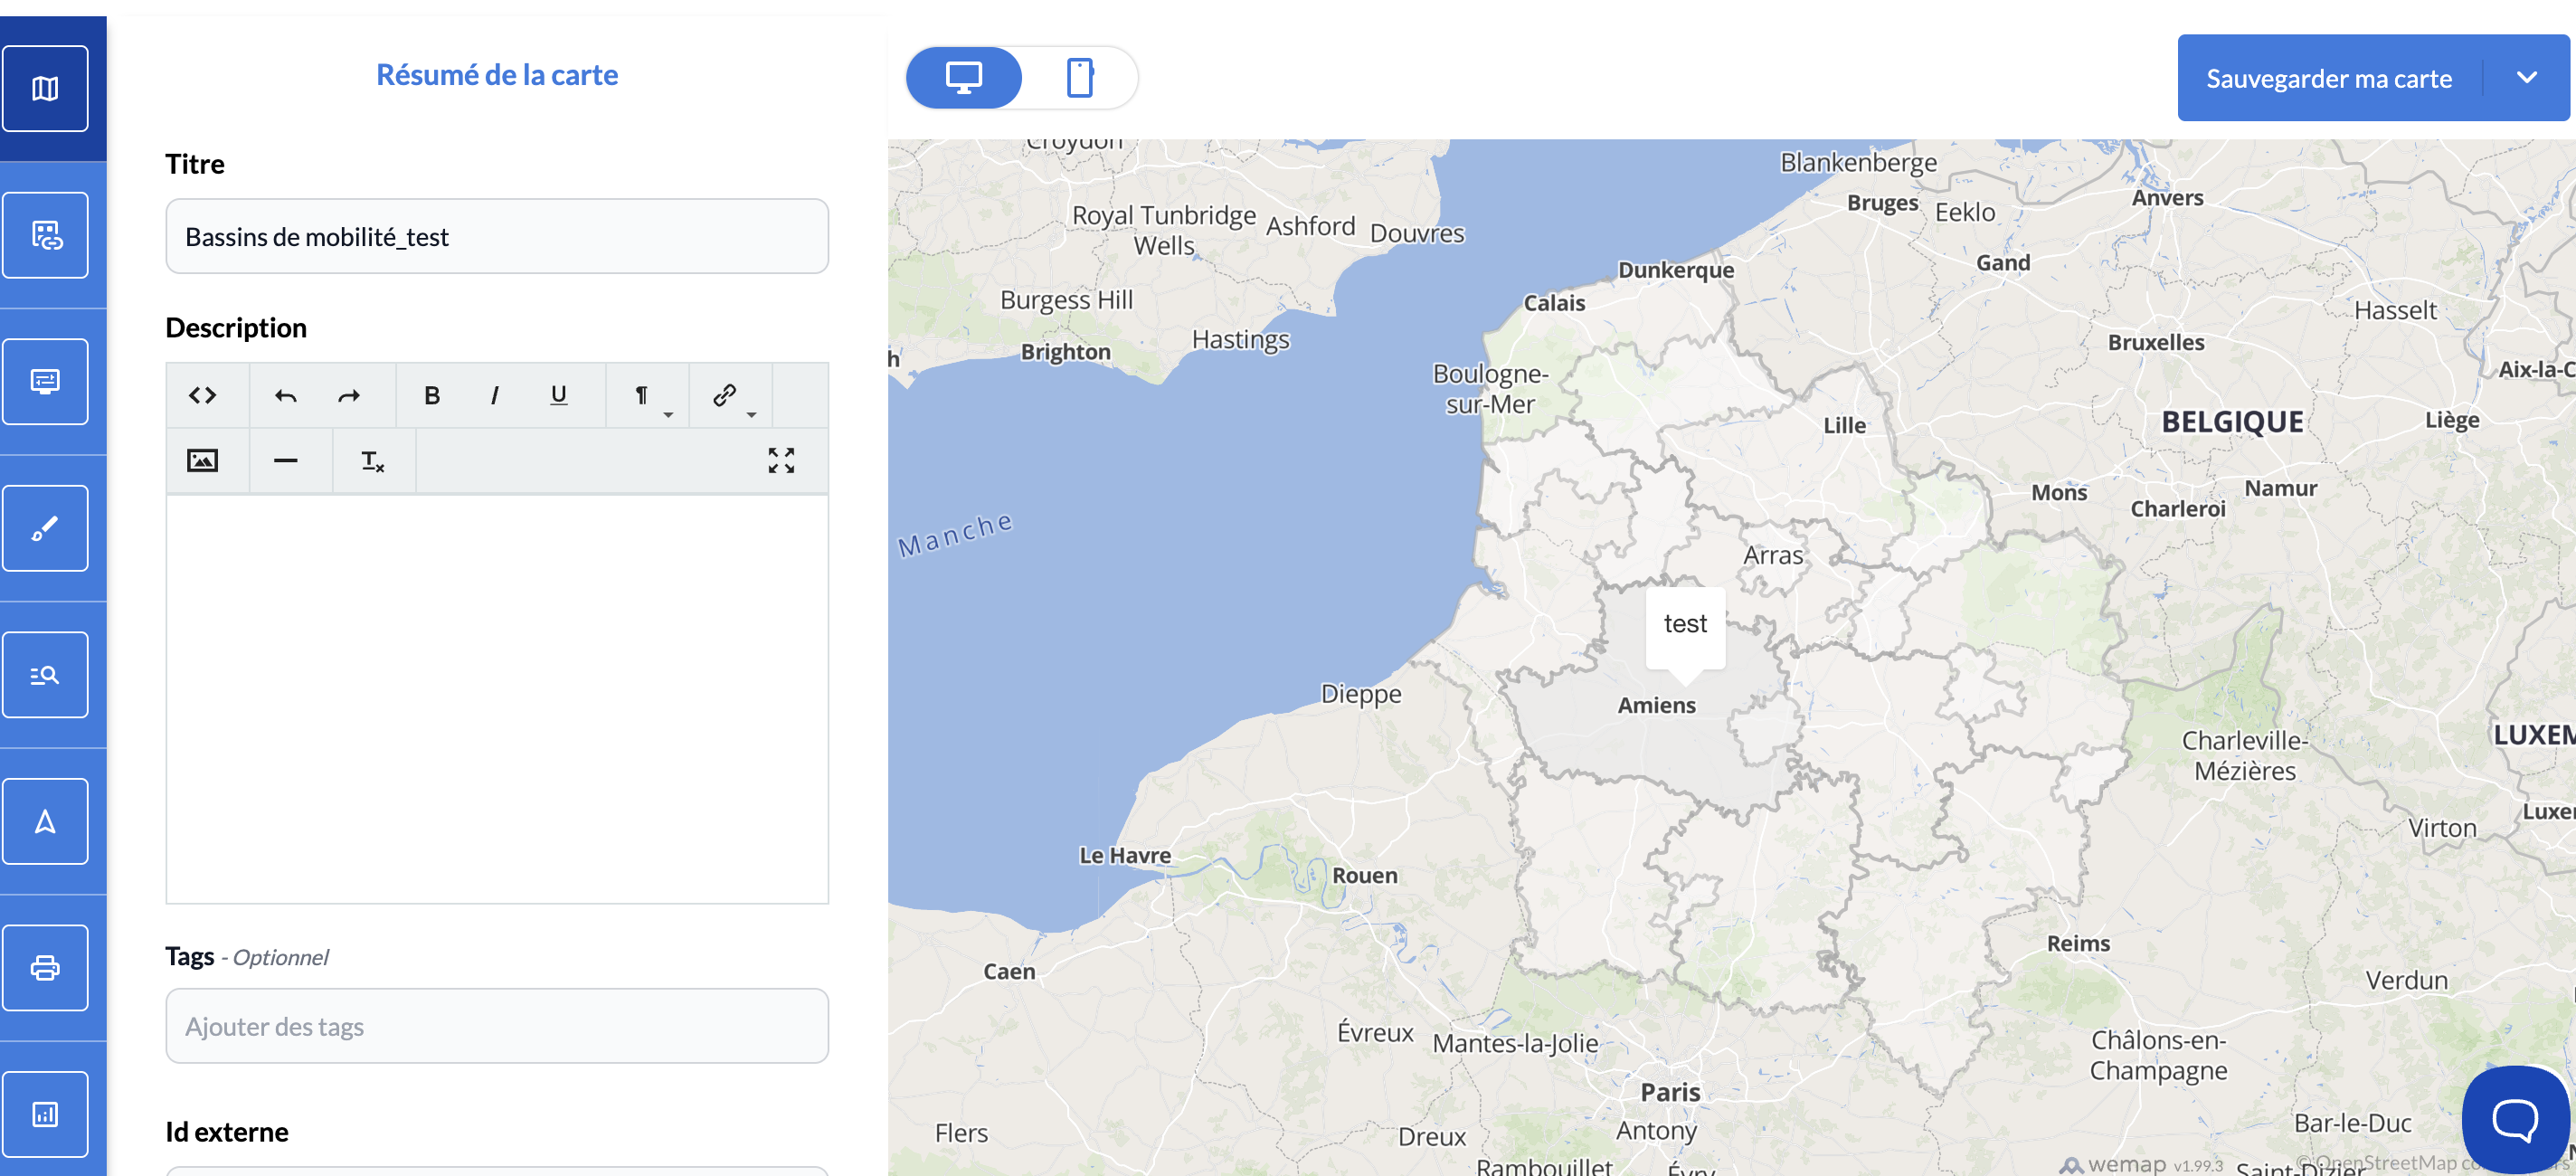
- Select "Pop-up", in the "Click Action" field.

- Click the "Customize Template" button that appeared below.

-
Enter the key of the content to display following the indicated format: {{key of content to display}}
Ex: if the "template_data" property corresponds to "description": "test", you must enter {{description}}
- Click "Save", at the bottom right.

- Then click "Save", at the top right to save the layer.
Your text now displays when clicking on the object.
📌 Note:
The content to display can also be formatted or contain a redirect link.
To do this, the template customization from the map (step 3 above) must have HTML formatting.
Ex: <a href="https://my.parisjetaime.com/plan-cimetiere-du-pere-lachaise\">{{name}}
⚙️ Layer Configuration
When configuring the map in Wemap Pro, you can initialize and customize the pop-up content directly via the layer settings.
👍 Best Practice:
Don't forget to save your changes 😉