How do I customize the clusters on my map?
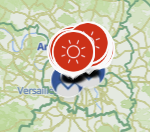
The cluster is like a magnet that groups points around it based on a defined radius and zoom level, to ensure good map readability.
🧲 Customize and configure clusters
- Go to your map
- Go to the "Formatting" menu, then to the "Clusters" section
- Click on "Use clusters"
- Customize the visual of your clusters:
- Use a profile photo as icon: the one defined in your account profile menu
- Use a custom icon: upload a visual from your computer
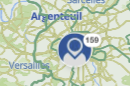
- Use the cluster circle: a circle indicating the number of points grouped under this cluster, whose color you can customize
- Configure the cluster display:
- Radius: allows you to define from what distance (in pixels) the algorithm aggregates points —> The higher the radius, the more points it will encompass.
-
Maximum zoom for clustering: allows you to define a maximum zoom level from which clusters no longer display to make way for individual points
This helps avoid, when grouped points are very close to each other, having to zoom very far on the map for the cluster to disappear in favor of the points.
—> If you indicate "10", clusters will no longer display from zoom level 10 and points will appear individually
💡 Tips:
- The ideal dimension for the cluster icon is 80 x 80 px
- You can lower the radius if you want to give an impression of a more populated map
- To avoid making the map unreadable on mobile, we recommend not configuring a radius lower than 20
Here are two examples with clusters enabled and clusters disabled: