
Create a list with the Google Sheets connector
On Wemap Pro, to display content on your map, you must create and associate a list containing this information.
To do this, you can use different methods, including the Google Sheets connector.
📁 Prepare the import file
First of all, in order to perform an optimal import, make sure to properly prepare your file:
-
Each point that should appear in your list has several properties. Each of them must be clearly defined and independently in a column of your file: 1 property = 1 column
Ex: one column for the ID, one column for the point name, one column for the address...
- Data must start at the first line of the first column:
- The first line of the file must contain the column headers
- The second line must contain the information of your first point
- The file must not contain any spaces at the beginning and end of cells
- 3 fields are essential for creating a point:
- ID: it must be unique and will be necessary for the mapping phase (you can simply number the points starting from 1 and adding 1 each time)
- Point name
- Address or latitude / longitude coordinates of the point
- You can also add other properties: description, image URL...
- If your data contains events, add 2 columns "Start date and time" and "End date and time" in ISO format (see Configure an event to display on my map: format and best practices)
👉 Here is a non-exhaustive template in Excel format, which you can import and reuse or reproduce on Google Sheets (in green the mandatory information): Download the template.
It contains a "Point" tab and an "Event" tab, with the related specificities.
You can add as many columns as properties associated with your point (to be associated later with Wemap Pro during the mapping phase).
📄 Create your list via Google Sheets
- Click on "Create" > "List"
- Select "Connect an app"
- Choose "Google Sheets" from the list and click on "Connect"
- Enter the URL of your file, then connect it by clicking on "Link": if your file contains multiple tabs, you must select the tab to use
-
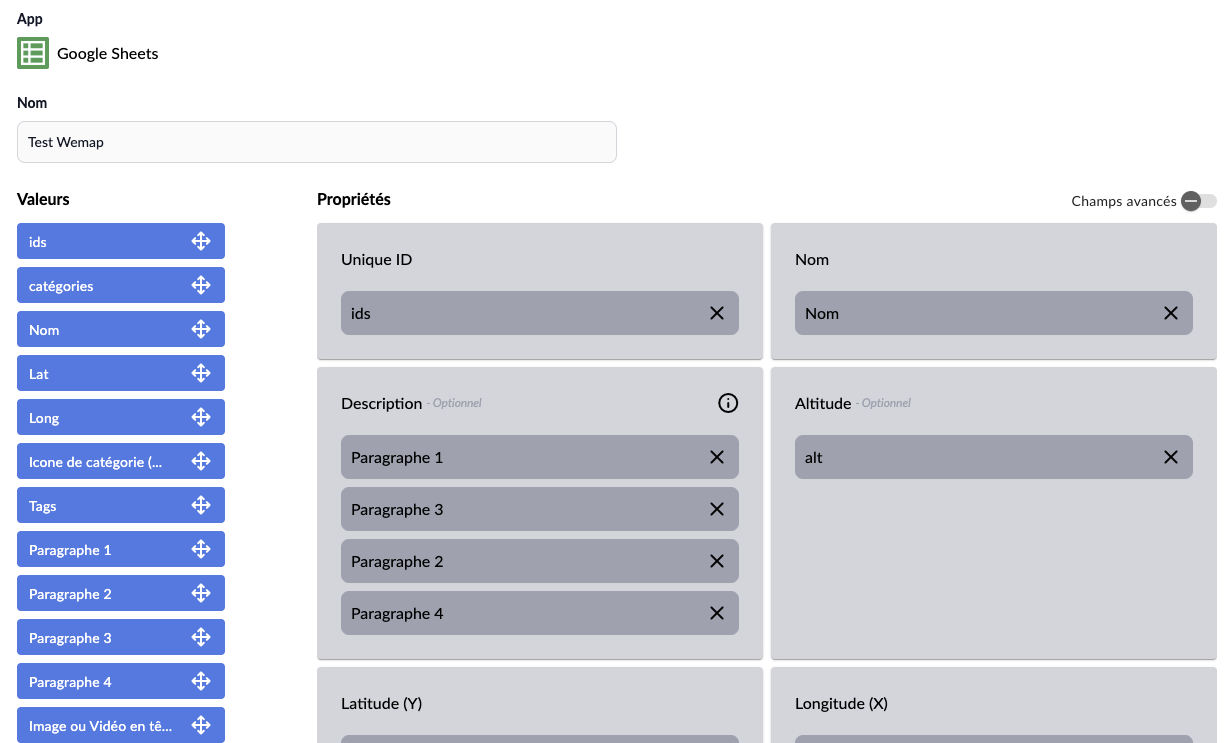
Proceed with mapping by associating at minimum the 3 mandatory fields (ID, name, address / coordinates)
-
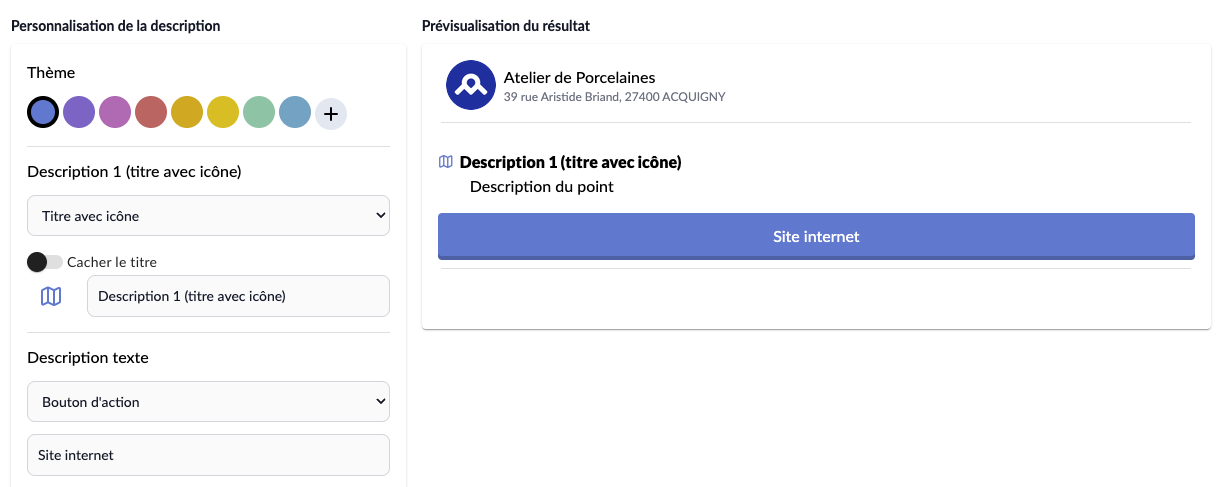
Style the information contained in the "Description" field
- Configure the display of your points on the map

👉 To learn everything about mapping, styling and configuring point display, see our article Customize my points template using mapping (edit field attribution)
- Click on "Import to a list"
After a few moments, a confirmation message appears in green, at the top right of your screen to confirm the import
Once completed, you can associate your list to a map.