
Using the Wemap spreadsheet after an Excel import
When creating a list via Excel import, your data is automatically centralized in a Wemap spreadsheet.
This facilitates updating your content: you can view and modify the information of the list's points directly from Wemap Pro.
Wemap spreadsheet organization
- To view/modify the spreadsheet, you must access your list.
- The spreadsheet is organized in the same way as your original Excel file:
- each row corresponds to a point;
- each column corresponds to the content/properties/information of the point.
- Any modification made in the spreadsheet will be automatically synchronized on the map to which the list is associated.
Managing and editing the spreadsheet
- Access your list to view your points' information in spreadsheet format.
- Proceed with updating the content of your points directly in the relevant cells.
Here are some details and tips for managing the spreadsheet:
- Address and location:
-
When you enter latitude/longitude data, our geocoding API automatically adds the corresponding postal address that will be displayed on the map.
Conversely, if you enter a postal address, our API generates the associated coordinates to locate the point.
- If you wish to manually enter the postal address, uncheck the "Use geocoding for address" option.
-
- Images:
- Unlike an external spreadsheet used for creating a list (Excel, Google Sheets), you are not required to pre-host your photos to obtain a URL and display an image in your points' descriptions.
- You can associate images to your points by adding images saved locally on your computer, by clicking on "+" in the "Image" column.
- Add a point:
- To add a point, click on "Add a row", in the top right.
- Complete the information in the spreadsheet:
- The required information is:
- Point name
- Address or Latitude/Longitude
- The required information is:
- Add additional properties:
- To add a property, you must add a column:
- click on "Modify columns";
- then on "Add a column".
- This appears on the right of the spreadsheet, following the last existing column:
- modify the column name;
- enter the information in the cell.
- Once finished, you must proceed with mapping your additional columns:
- click on "Edit description";
-
move the field corresponding to your column into "Description": this is a simplified mapping that allows you to add the information contained in these additional columns and customize them.
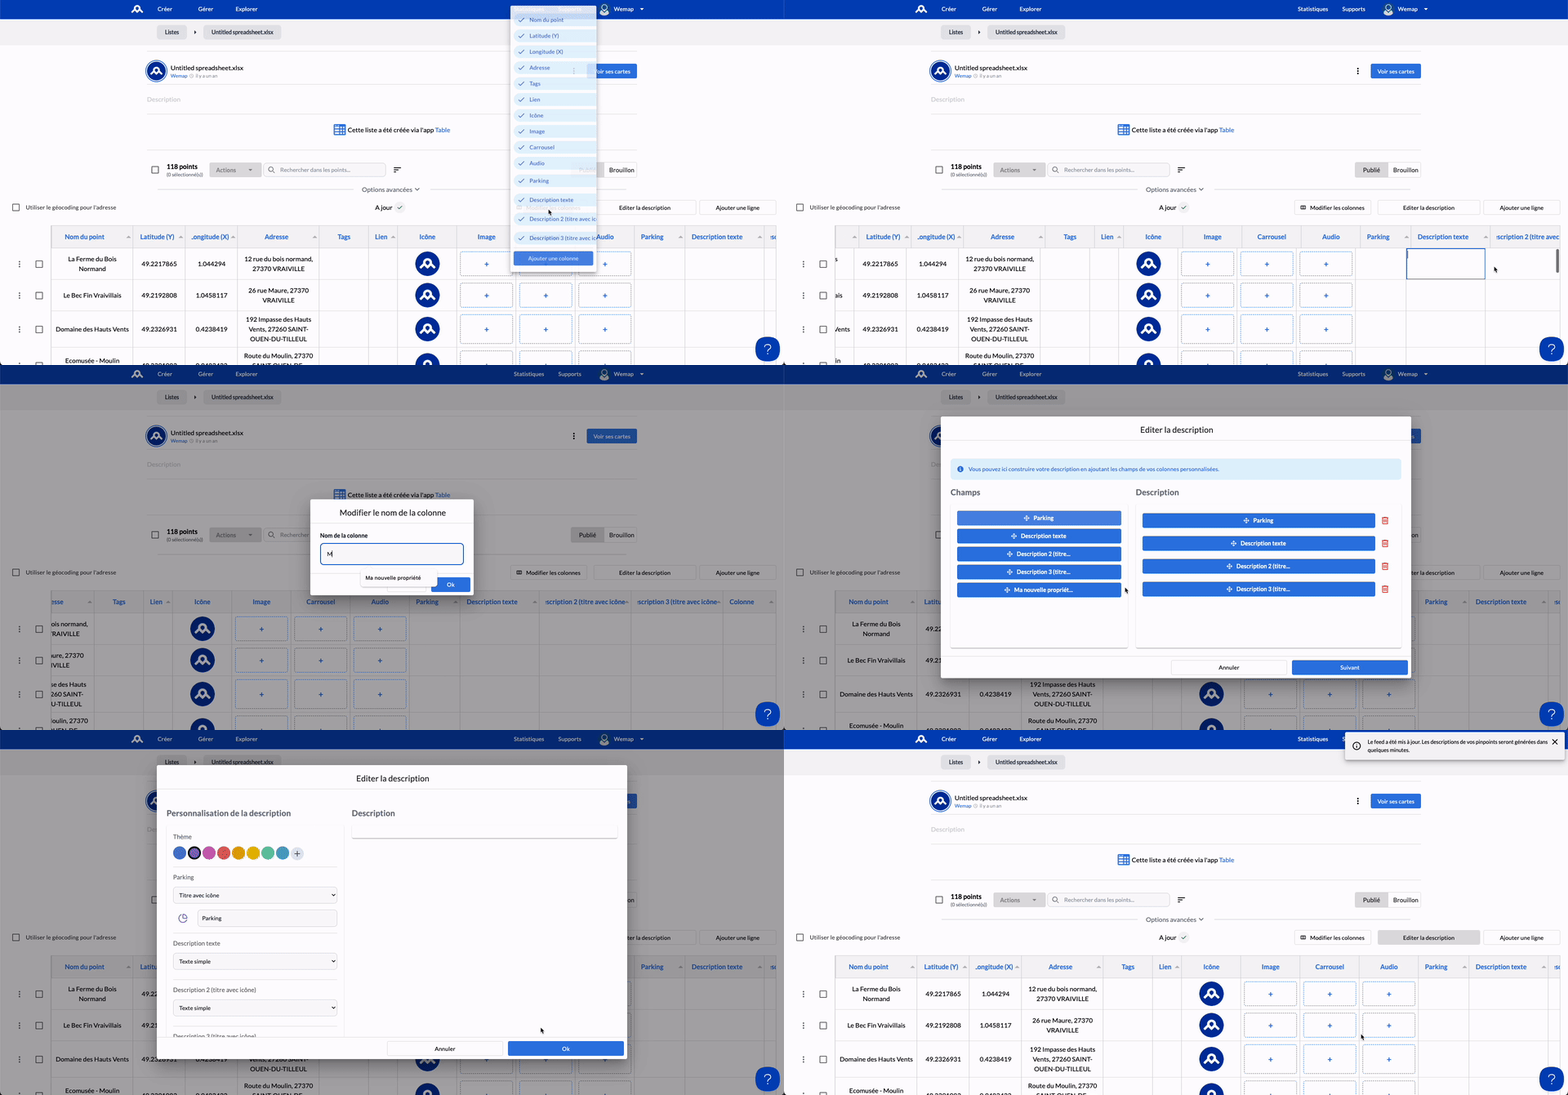
- To add a property, you must add a column:
📌 Note:
You can also delete a column that you have added yourself (but not those that were imported via the initial Excel file) from "Modify columns": click on the column name, then on the trash icon.