
Create a pop-up on click on a layer-type resource
Adding a pop-up on click on an object allows you to customize your map and make it more dynamic and interactive for users.
🛠️ GeoJSON Format
Displaying a pop-up on click requires importing a file in GeoJSON format, with the following structure:
json
{
  "type": "Feature",
  "properties": {
    "Name": "nom de mon point",
    "description": "je décris mon objet",
    "id": 1.0,
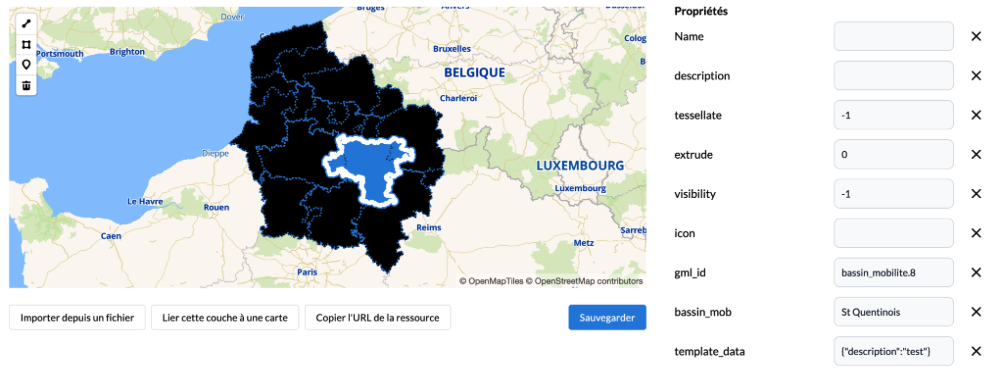
    "template_data": { "description": "test"
    }
  }
}
💡 Tip:
The template_data key will contain the content displayed in the pop-up:
- "template_data" corresponds to the key / property name in the file
- "description" corresponds to the key of the content to display
- "test" corresponds to the content to display
Simply add the template_data property to a standard GeoJSON and replace "test" with the content you want to display for each object.
You can also add another key than "description", for example "name" etc (depending on the content you associate with it).
🗺️ Integration in Wemap Pro
☝️ Adding the GeoJSON file
- Go to Wemap Pro.
- Create a new resource: "Create" > "Resources".
- Enter the resource name and select "Data Layer".
- Click on "Create resource".
- Add your GeoJSON file by clicking on "Import from file".

🧪 Customization & Integration
Customize your resource to your liking and remember to verify that it contains no errors (names, description, JSON structure...).
🗺️ Add the resource to a map
Two options are available:
- Create a new map → "Create" > "Map"
- Use an existing map → "Manage" > "My maps"
From the map interface:
- Select "Styling", in the left sidebar.
- Click on "Manage layers".
- Choose "Add from editor".
- Select the GeoJSON resource you created, then click on "Add".

🎯 Trigger the click action and customize the pop-up description
In the layer options:
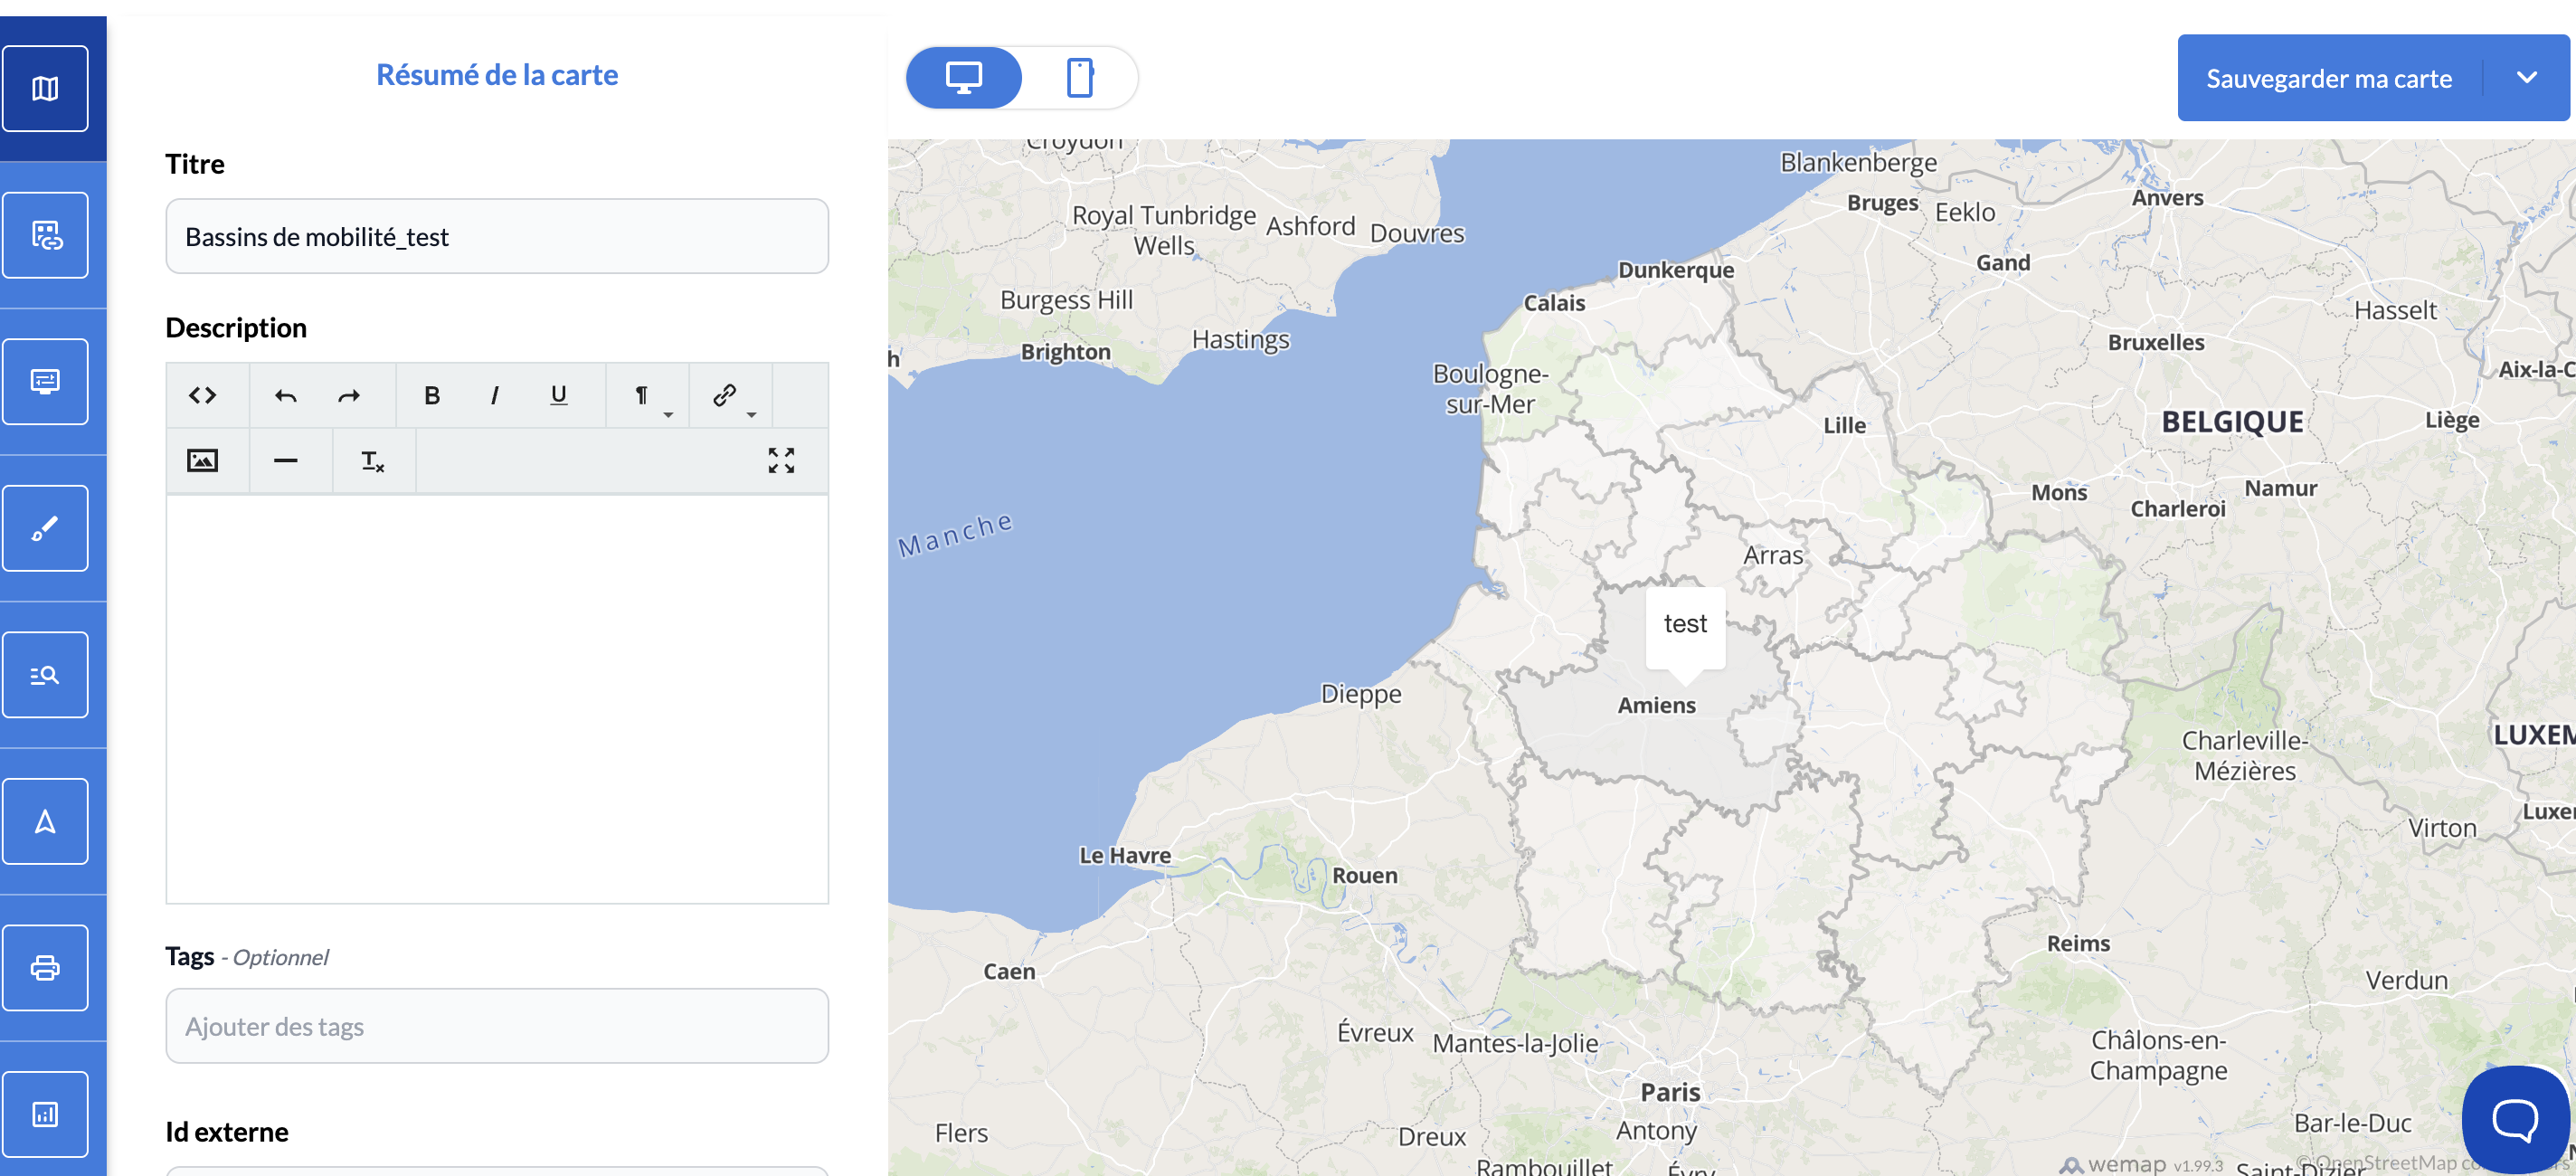
- Select "Pop-up", in the "Click action" field.

- Click on the "Customize template" button that appeared below.

-
Enter the key of the content to display following the indicated format: {{key of the content to display}}
Ex: if the property "template_data" corresponds to "description": "test", you must enter {{description}}
- Click on "Save", at the bottom right.

- Then click on "Save", at the top right to save the layer.
Your text now displays when clicking on the object.
📌 Note:
The content to display can also be formatted or contain a redirect link.
To do this, the template customization from the map (step 3 above) must have formatting in html format.
Ex: <a href="https://my.parisjetaime.com/plan-cimetiere-du-pere-lachaise\">{{name}}
⚙️ Layer Settings
When configuring the map in Wemap Pro, you can initialize and customize the pop-up content directly via the layer settings.
👍 Best practice:
Don't forget to save your actions 😉